| English |
|---|
| German |
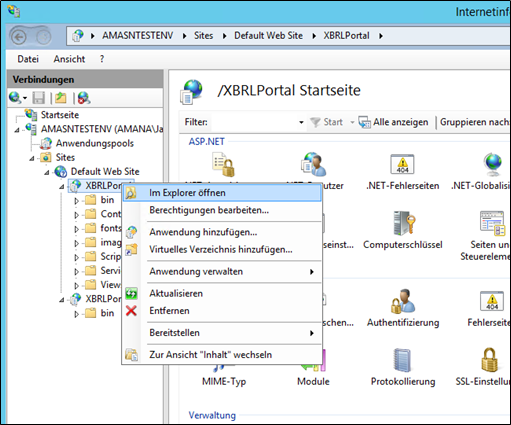
The XBRL portal must now be configured to allow communication with the XBRL processing service and access to the XBRL cache. Manual setup via web.configOpen the local application path of the portal by right-clicking on the application in the IIS Manager and open the path in Explorer.
In order to be able to edit the settings, the access rights to the configuration file must now be adjusted. Open the properties menu with a right click on the file "web.config".
The permissions must be adjusted as described in the chapter Setting up the XBRL Cache. The file can then be opened and edited with the editor. In the first step the entry <add key="XbrlSettingsFilePath" [...]> must be found and changed. Enter the absolute path of the file "SmartXBRLSettings.xml" copied in the chapter Setting up the XBRL-Cache in the value field. If these instructions were followed, this is the same:
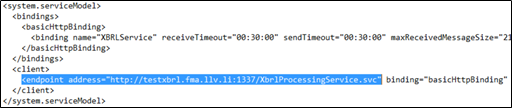
In the second step, the address of the XBRL processing service must be made known to the portal. To do this, the value address in the <endpoint [...]> entry is adjusted according to the address assigned to the service in the chapter Import of an Application (for example, http://localhost:1337/XbrlProcessingService.svc).
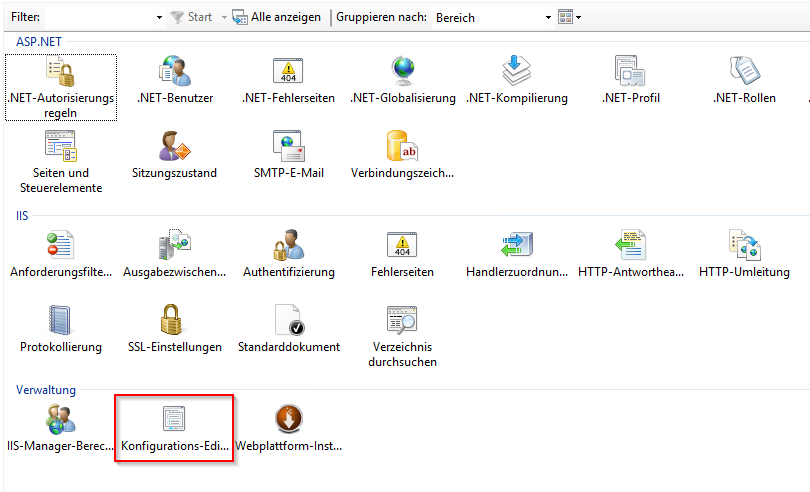
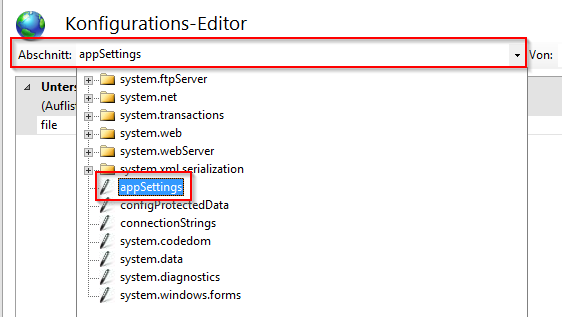
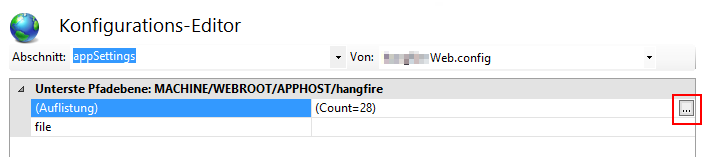
After both changes, the file can be saved and closed. Further settings can be made in the application. Single Sign-On with Active DirectoryThe configuration setting DisableSso defines whether the user is automatically logged in directly with his Windows account or asked for his local user credentials when accessing the Portal. It must be set to "false" for Single Sign-On. The system setting AdAuthenticationDomain can be used to set the Active Directory domain. The Active Directory roles can be assigned to the application roles available on the XBRL portal in the menu item Master Data → Users and Roles in the "Roles" area. Setup via the IIS Configuration ManagerAfter a click on the corresponding application in the IIS, the configuration manager can be opened. The "appSettings" area must then be selected in the configuration editor.
|

| German |
|---|
Das XBRL-Portal muss nun so konfiguriert werden, dass eine Kommunikation mit dem XBRL-Processing-Service möglich ist und der Zugriff auf den XBRL-Cache ermöglicht wird. Manuelle Einrichtung über die web.configDazu muss zunächst der lokale Anwendungspfad des Portals geöffnet werden. Dazu kann im IIS-Manager nach einem Rechtsklick auf die Anwendung der Pfad im Explorer geöffnet werden.
Um die Einstellungen bearbeiten zu können, müssen nun noch die Zugriffsrechte auf die Konfigurationsdatei angepasst werden. Dazu muss nach einem Rechtsklick auf die Datei "web.config" das Eigenschaften-Menü aufgerufen werden.
Die Berechtigungen müssen analog zur Beschreibung im Kapitel Einrichten des XBRL-Cache wie dargestellt angepasst werden. Folgend kann die Datei mit dem Editor geöffnet und bearbeitet werden. Im ersten Schritt muss der Eintrag <add key=“XbrlSettingsFilePath“ [..]> gesucht und geändert werden. Im value-Feld muss hier der absolute Pfad der im Kapitel Einrichten des XBRL-Cache kopierten Datei "SmartXBRLSettings.xml" angegeben werden. Wurde dieser Anleitung gefolgt, entspricht dieser: C:\inetpub\XBRLData\SmartXBRLSettings.xml oder bei Ablage auf einem anderen Laufwerk: F:/Portal/XBRLData/
Im zweiten Schritt muss dem Portal die Adresse des XBRL-Processing-Service bekannt gemacht werden. Dazu wird im Eintrag <endpoint […]> der Wert address entsprechend der im Kapitel Import einer Applikation für den Service vergebenen Adresse angepasst werden (z.B. http://localhost:1337/XbrlProcessingService.svc). Nach beiden Änderungen kann die Datei gespeichert und geschlossen werden. Weitere Einstellungen können in der Applikation vorgenommen werden und sind mit möglichen Werte pro Applikation werden in Abschnitt 5.4 beschrieben. Single Sign-On mit Active DirectoryOb der Benutzer beim Aufrufen vom Portal automatisch direkt mit seinem Windows-Account eingeloggt oder nach seinen lokalen Benutzerdaten gefragt wird, definiert die Konfigurationseinstellung DisableSso. Sie muss auf „false" gesetzt werden, damit Single Sign-On erfolgt. Durch die Systemeinstellung AdAuthenticationDomain kann die Active Directory Domäne gesetzt werden. In der Oberfläche unter dem Menüpunkt Stammdaten > Benutzer und Rollen im Bereich „Rollen" können die Active Directory Rollen den auf dem XBRL Portal vorhandenen Applikationsrollen zugeordnet werden. Einrichtung über den IIS-KonfigurationsmanagerNach einem Klick auf die entsprechende Applikation im IIS, kann hier der Konfigurationsmanager aufgerufen werden. Im Konfigurationseditor muss danach der Bereich „appSettings" ausgewählt werden. |